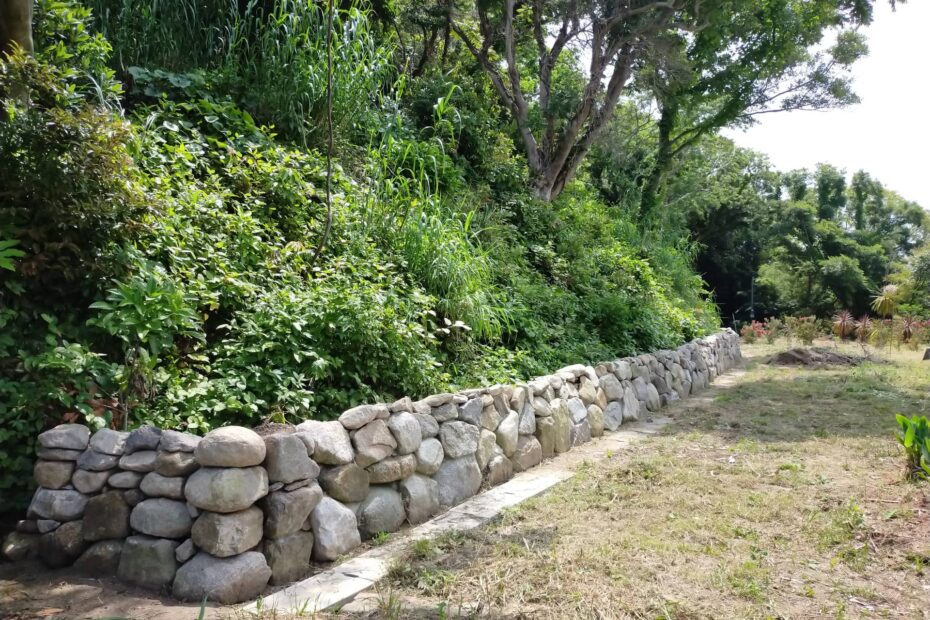
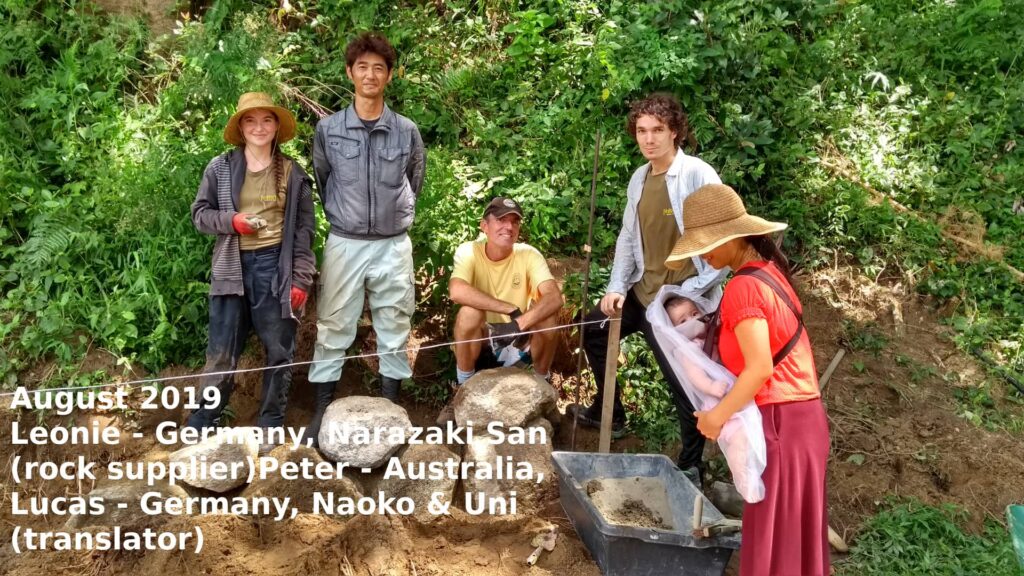
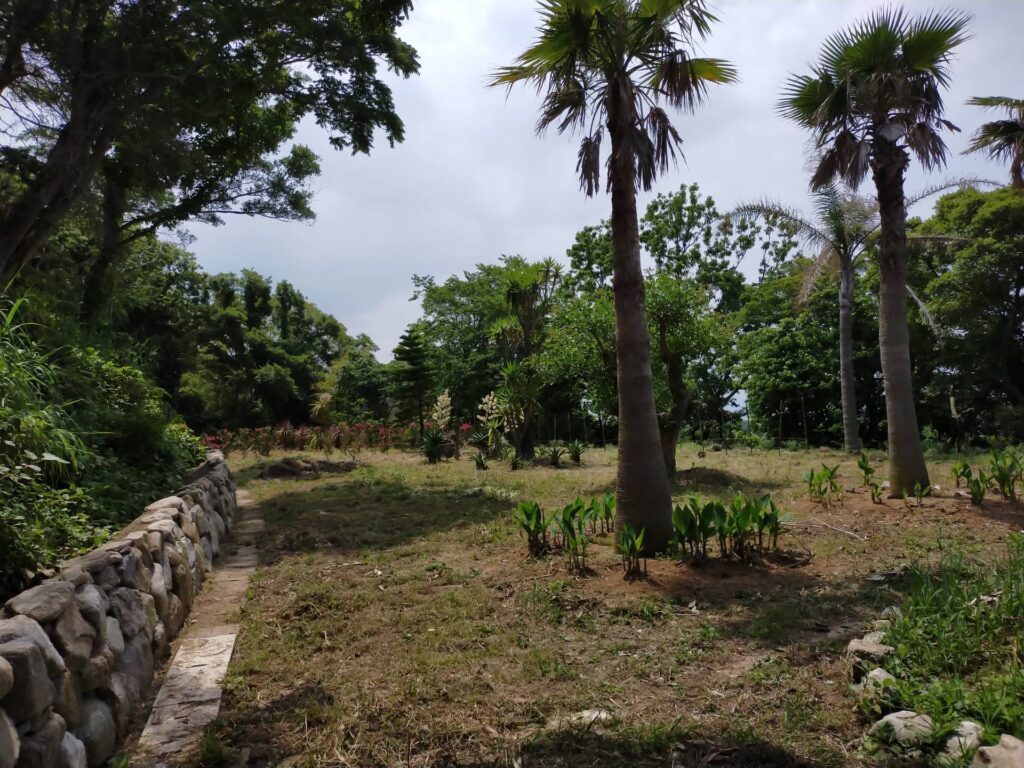
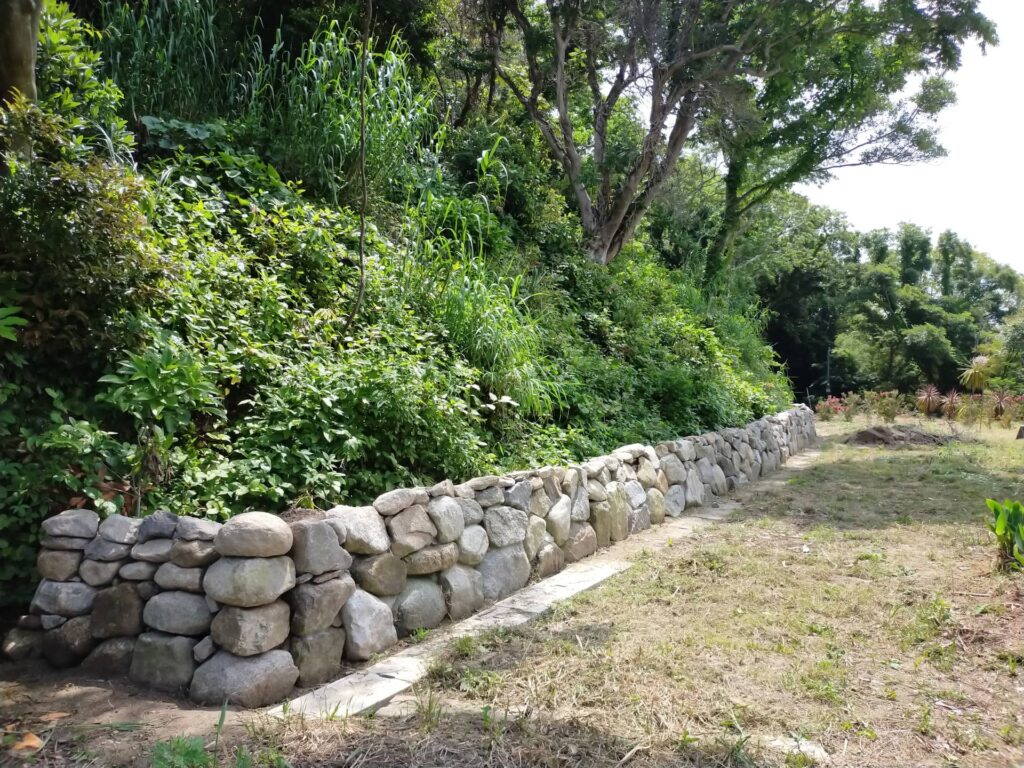
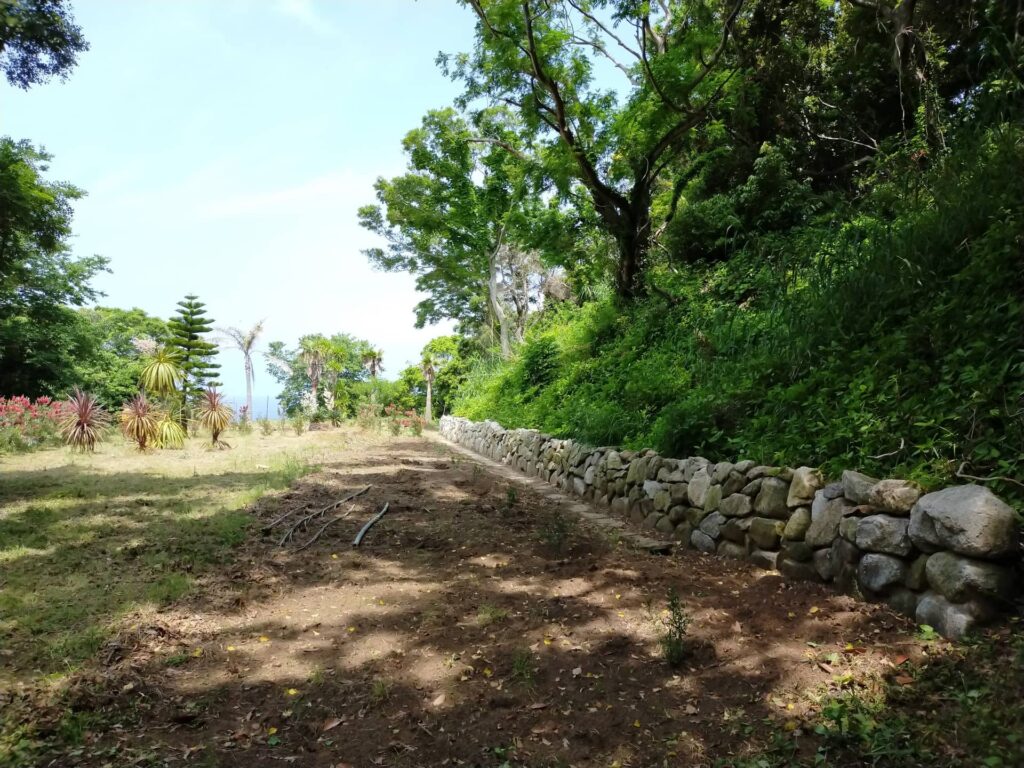
Back in the summer of 2019 Jonathan announced that he wanted a 55m long and 1m high rock wall building in the American / Australian garden. I hadn’t actually built such a wall before but nonetheless I proposed to build it myself along with the volunteers. We could have got the pro’s in to do it for us, who I assume would have done a better job, but that wouldn’t have been as much fun and we wouldn’t have learned as much either.
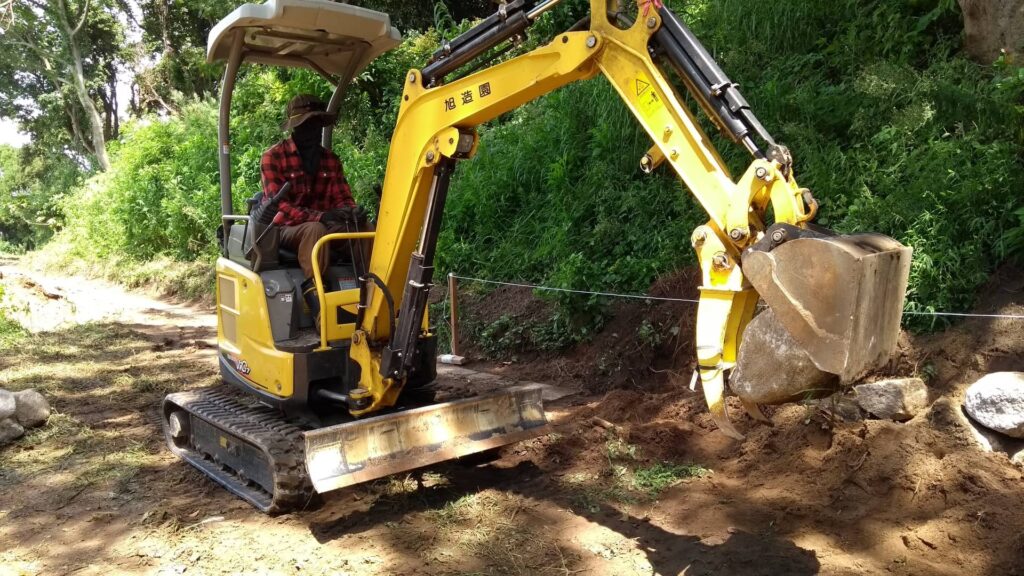
We sourced the rocks and fine gravel from a local landscape company called Asahi landscape, yes the same name as the beer, although it is best to drink beer after a wall building session and not beforehand. The owner, Narazaki San, was also kind enough to leave his digger behind for me to use for a while. This was on the condition that I show him I could operate it safely. Now, I am not offically trained on this machine and had only used one a couple of times before, which was many years ago, so I was put on the spot. Fortunately, I managed to work it out fairly quickly and impressed him with my skills, so he let us use it for free for nearly a month. Great guy.
He also came for one morning to show us the wall building techniques and secrets, which I will now share with you.
First prepare the ground. Our wall is built at the bottom of a steep slope which meant we had to cut out a portion of the bank at the bottom. For this we used the digger. After digging out the soil, next was levelling the ground and tamping it firmly. We used the digger for all of this.
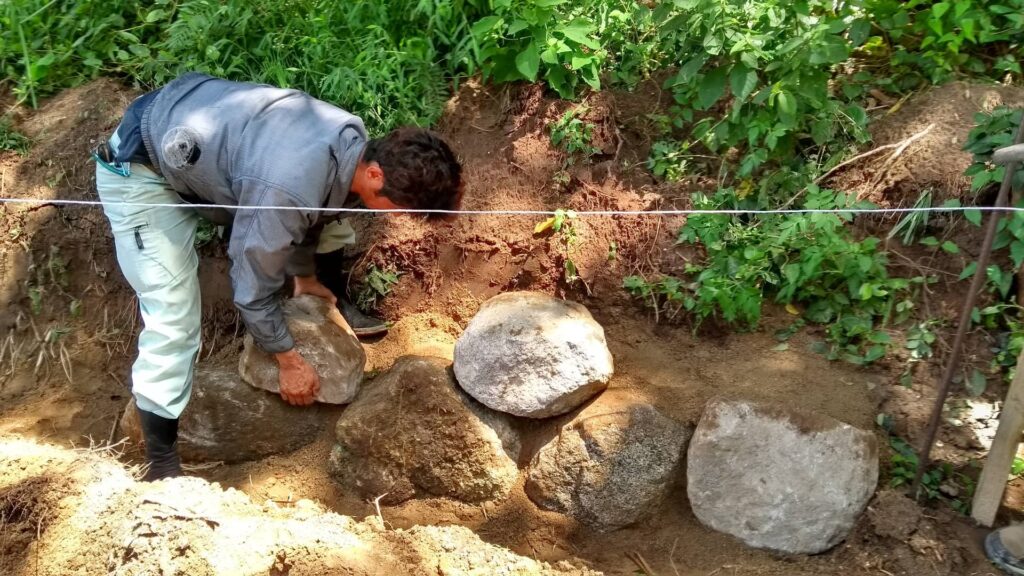
Next was to place the first layers of rocks. It is best to use the biggest rocks for the base layer to give good support for the upper layers. These rocks were too big to carry so I used to digger again to drop them into place. They still needed some handballing to get them exactly where you want them. As all the rocks are different shapes and sizes it is like putting a jigsaw puzzle together, so you have to play around with them to find the right one and the best orientation.
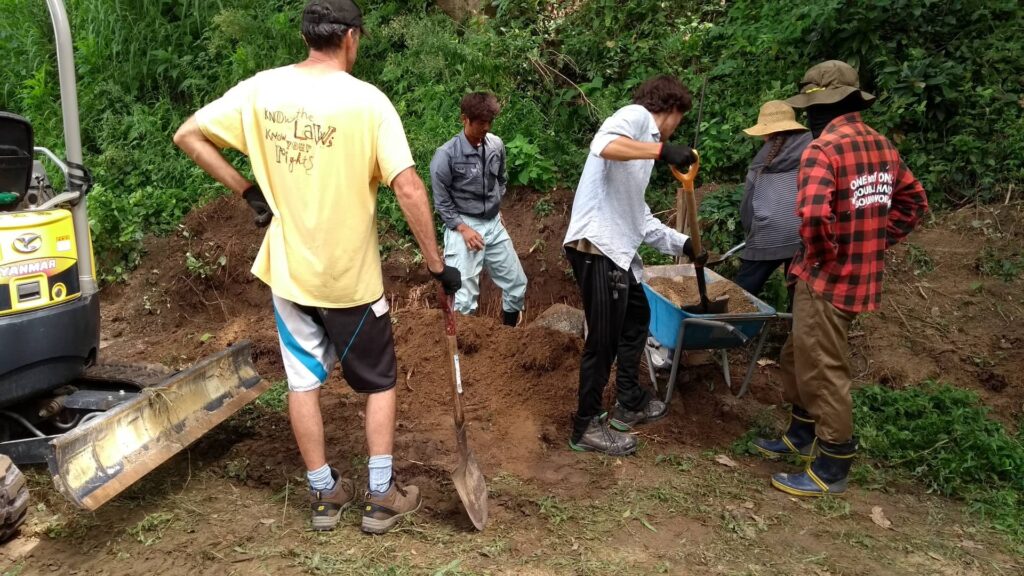
After each rock is placed gravel is immeditately place behind and compacted a little to support it. Ideally, we aimed for a flattish front and for the rock to lean back slightly. The entire wall leans backwards into the gravel behind for support and the gravel is in turn supported by the bank behind. This way wall cannot fall forwards or backwards and will stay in place.
After the first layer is completed we repeated the process for the second layer, using slightly small rocks. By this time the digger had gone as we had to lift all the rocks by hand. This process repeats until you reach the desired height. The top layer was actually the most difficult as we had to find rocks that matched the height of the one next to it.
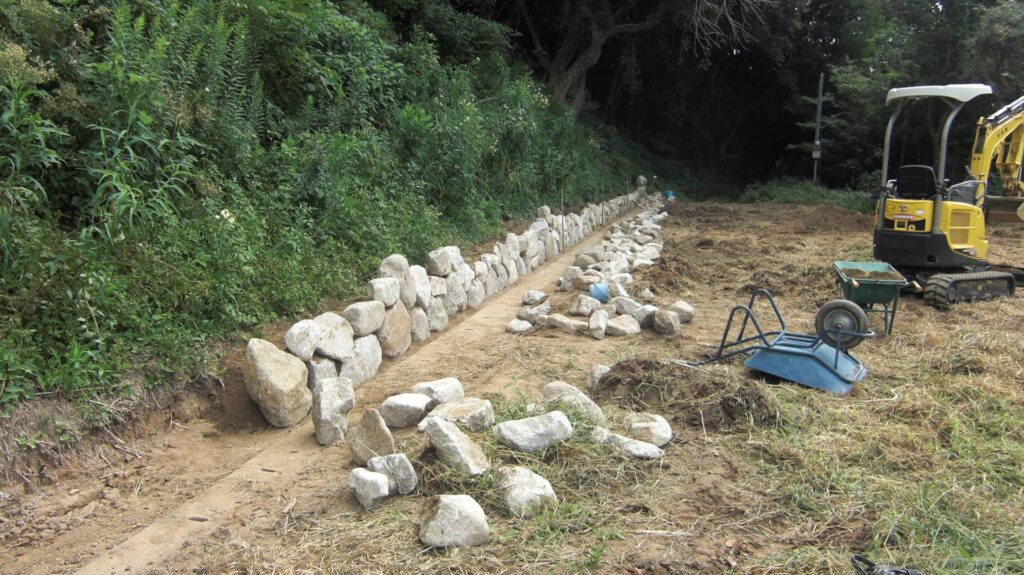
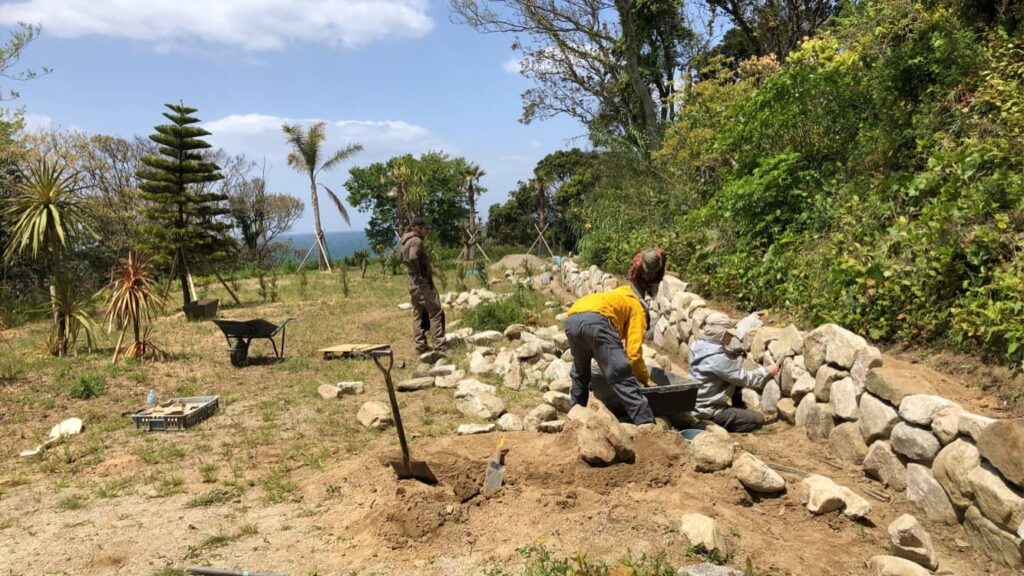
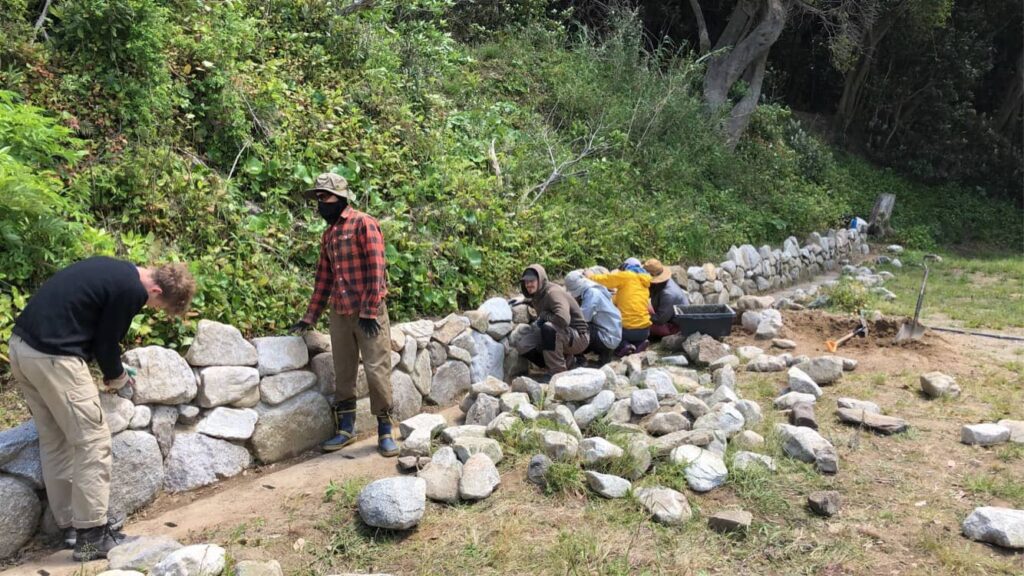
There is something else that needed doing along the way and that is applying concrete to the front in the gaps where the rocks touch each other. This prevents the gravel from falling through the gaps and gives a bt of extra support. We haven’t finished this bit yet as its quite time consuming.
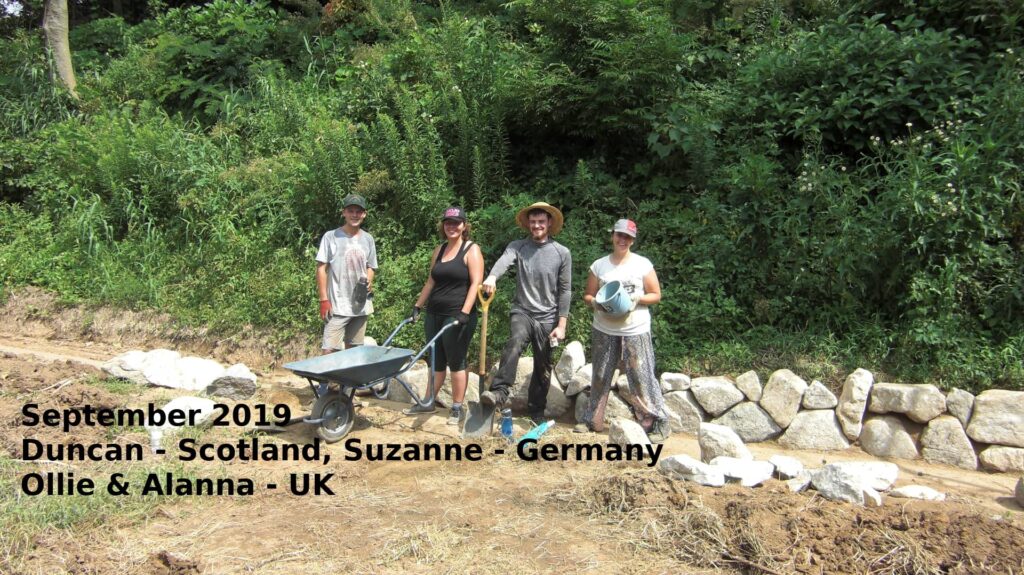
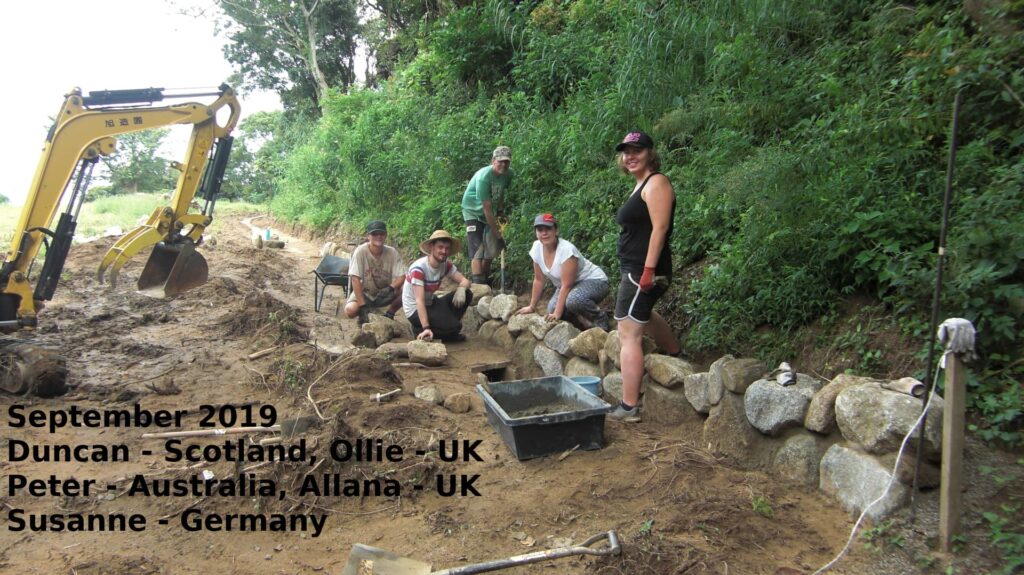
There are some rocks on the top layer that may need swapping to give a better finish and a bit of concreting at the front, but other than that its more or less finished and it only took us a year and a half! Not really though, as we didn’t work on it full time and just did bits sporadically.
Thanks to all the workawayers and other volunteers who helped build the Great Wall of Itoshima. There will be some poeple who didn’t get in the photos but you are not forgotten.